Minikube is a popular option for running Kubernetes (K8S) locally. In this blog post, I'll go through the steps required to run Minikube on MacOS and go a step further with setting up a Helm Chart to deploy a simple container
Install Homebrew
The easiest way to set up all of this is via Homebrew - a very popular package manager for MacOS
Follow the instructions on the Homebrew website or just run this command in a Terminal:
/bin/bash -c "$(curl -fsSL https://raw.githubusercontent.com/Homebrew/install/HEAD/install.sh)"Install Docker
In order to run Minikube we need a container manager. Go to Docker and install the latest version. There are other alternatives, such as podman but for this example, we'll stick with Docker.
Install Minikube
Installing Minikube is as simple as:
brew install minikube
Now we can start minikube:
minikube start
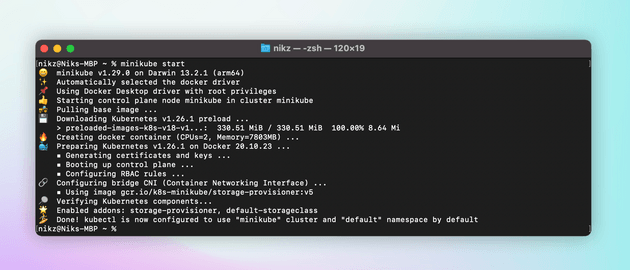
this will start the one-node cluster. You can see the running container by executing docker ps:
$ docker ps

CONTAINER ID   IMAGE                                 COMMAND                  CREATED          STATUS          PORTS   NAMES
e544dbbe61eb   gcr.io/k8s-minikube/kicbase:v0.0.37   "/usr/local/bin/entr…"   1 minute ago     Up 1 minute     ...     minikube
minikube will automatically create a kube config for you in ~/.kube/config that looks something like this:
apiVersion: v1
clusters:
- cluster:
    certificate-authority: /Users/nikz/.minikube/ca.crt
    extensions:
    - extension:
        last-update: Wed, 15 Mar 2023 08:17:02 GMT
        provider: minikube.sigs.k8s.io
        version: v1.29.0
      name: cluster_info
    server: https://127.0.0.1:65343
  name: minikube
contexts:
- context:
    cluster: minikube
    extensions:
    - extension:
        last-update: Wed, 15 Mar 2023 08:17:02 GMT
        provider: minikube.sigs.k8s.io
        version: v1.29.0
      name: context_info
    namespace: default
    user: minikube
  name: minikube
current-context: minikube
kind: Config
preferences: {}
users:
- name: minikube
  user:
    client-certificate: /Users/nikz/.minikube/profiles/minikube/client.crt
    client-key: /Users/nikz/.minikube/profiles/minikube/client.key
Install Helm
Next, we'll install Helm - a package manager for Kubernetes that will help us define, install and upgrade our application easily.
Just like before, installing it on MacOS is pretty easy:
brew install helmCreate and Install Helm Chart
To create a Helm Chart run helm create <name> for example
$ helm create my-test-appthis will create the following folder structure with a bunch of yaml files.
├── Chart.yaml
├── charts
├── templates
│   ├── NOTES.txt
│   ├── _helpers.tpl
│   ├── deployment.yaml
│   ├── hpa.yaml
│   ├── ingress.yaml
│   ├── service.yaml
│   ├── serviceaccount.yaml
│   └── tests
│       └── test-connection.yaml
└── values.yaml
It's mostly boilerplate and sample code that we can ignore for a start and just focus on two files values.yaml and deployment.yaml.
The values.yaml is where we define the input parameters. We can add more parameters here and structure it as we please (as long as we conform to the yaml syntax). The important part of the example app is:
replicaCount: 1

image:
  repository: nginx
which defines the number of replicas and the image we are going to use. In this case, it's nginx - the popular OSS web server. The input parameters are used in deployment.yaml for our Kubernetes Deployment
apiVersion: apps/v1
kind: Deployment
spec:
  replicas: { { .Values.replicaCount } }
  #...
  template:
    #...
    spec:
      #...
      containers:
        - name: { { .Chart.Name } }
          #...
          image: '{{ .Values.image.repository }}:{{ .Values.image.tag | default .Chart.AppVersion }}'
At this point, we can just run
$ helm install my-test-app .and the example code comes with a hint in the NOTES.txt that will give you few extra commands required to forward the ports of the container:
NAME: my-test-app
LAST DEPLOYED: Wed Mar 15 08:50:16 2023
NAMESPACE: default
STATUS: deployed
REVISION: 1
NOTES:
1. Get the application URL by running these commands:
export POD_NAME=$(kubectl get pods --namespace default -l "app.kubernetes.io/name=my-test-app,app.kubernetes.io/instance=my-test-app" -o jsonpath="{.items[0].metadata.name}")
export CONTAINER_PORT=$(kubectl get pod --namespace default $POD_NAME -o jsonpath="{.spec.containers[0].ports[0].containerPort}")
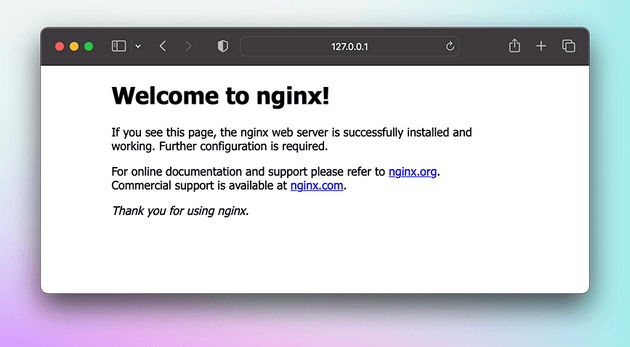
echo "Visit http://127.0.0.1:8080 to use your application"
kubectl --namespace default port-forward $POD_NAME 8080:$CONTAINER_PORTafter running the three commands
$ export POD_NAME=$(kubectl get pods --namespace default -l "app.kubernetes.io/name=my-test-app,app.kubernetes.io/instance=my-test-app" -o jsonpath="{.items[0].metadata.name}")
$ export CONTAINER_PORT=$(kubectl get pod --namespace default $POD_NAME -o jsonpath="{.spec.containers[0].ports[0].containerPort}")
$ kubectl --namespace default port-forward $POD_NAME 8080:$CONTAINER_PORT
we can go to http://127.0.0.1:8080 and check our running instance on nginx 🥳
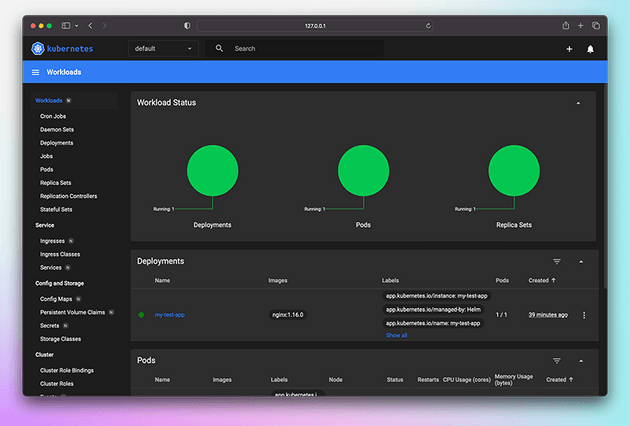
Minikube Dashboard
Finally, on a separate Terminal tab, you can launch the Minikube Dashboard
minikube dashboard
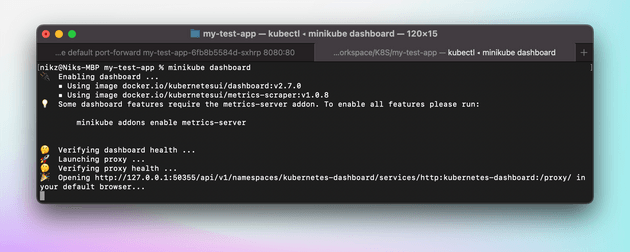
The Dashboard gives us a nice web-based interface to Kubernetes and allows us to
- monitor cluster resources
- deploy applications
- troubleshoot and monitor resources
- inspect logs
- get an overview of the applications running on the cluster